
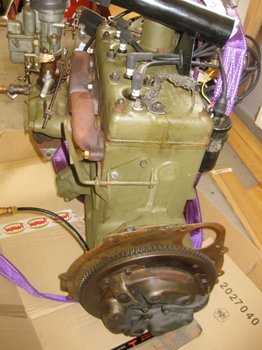
This Article describes how to replace your WWII Jeep Clutch. Applies to 1942,42,1943,43,1944,44,1945 Jeeps models


|
1. One common reason for clutch failure is the thrust bearing that operates the clutch mechanism. In my case it got stuck and acted as a grinder on the adjustment screws. |
|
2. The easiest way to work on the clutch is to remove the engine. This is easier than it sounds and saves a lot of trouble in the later process. |
|
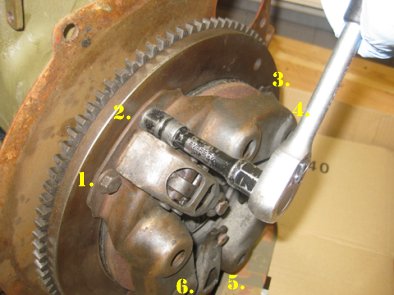
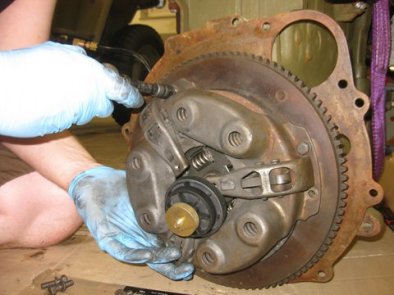
3. We start by removing the pressure plate assembly. It is held in place on the flywheel by six bolts and clamps down the friction plate. |
|
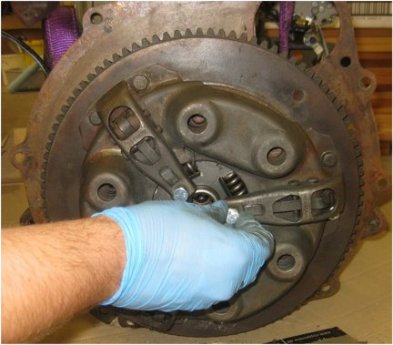
4. This picture shows the complete assembly coming apart. |

|
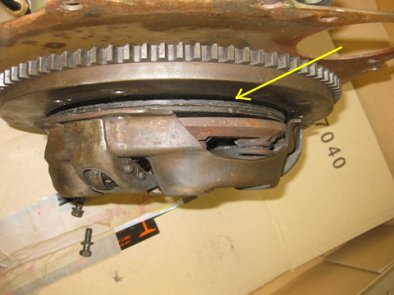
5. With everything disassembled the screws are removed I highly recommend to change the friction disc as well just to save the extra effort to pull the engine again next year. |

|
6. When you have your clutch disc and pressure plate off, inspect both, with excessive wear, it would be good to replace both with the effort you have taken to replace this. |
|
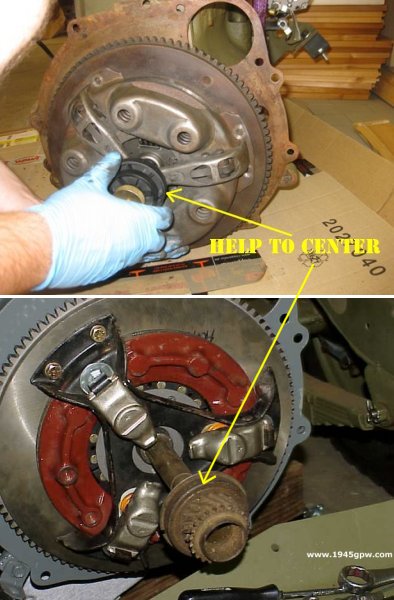
7. When re-assembling the clutch it is extremely important that all parts are properly centered. As the friction disc floats freely between the thrust plate and the flywheel at this stage, it needs to be aligned properly. I am using an adjustable special tool for this purpose but a garage solution, e.g. a broom stick with the right diameter, will do the same job. |
|
8. Next, the thrust plate is bolted to the flywheel. Slowly tighten the bolts, moving around the assembly several times to keep the pressure even and avoid warping the friction plate. |
|
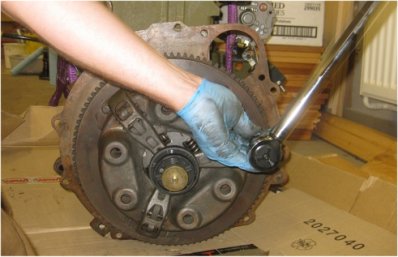
9. To finish the process, apply the proper torque (20 lb-ft) to all bolts, working in a double-X pattern. |
|
10. Finally, the adjustment screws are replaced. |

|
11. The last step is to set the adjustment screws to the correct height. |

|
12. The army manual instructs you to put a straightedge across the pressure plate and to set the distance between the straightedge and the face of the friction plate to 2 27/32”. I prefer to tell you that the screws should be set in a way that the thrust bearing has sufficient clearance to fully engage the clutch while not in use (to avoid excessive wear and proper friction) but only as much clearance as needed to fully disengage the friction plate when depressing the pedal. If in doubt, check through the open service hole in the bell after installation! |
